Thursday, 31 January 2019

Roasted Pumpkin Salad (in jars)


Roasted pumpkin salads in jars are great to make ahead.  I am sharing two such recipes of salad in a jar.
The pumpkin when roasted takes on a sweet and earthy flavor that goes really well in salads. Usually, roasting pumpkin involves a large batch and so making the salads in jars seems perfect. This way , the salads may be stored and consumed later.

I like to keep the flavouring really simple, just a bit of salt and pepper and some oil. This allows for the pumpkin to be used as a base in more than one recipe.

Since salad in a jar recipes are a rage these days, why not try it out? The salad jars have everything in them from the seasoning to the dressing. So, the salad just needs to be tossed (in a bowl) right before serving.

Click the link below for the video recipe:


For more such recipes, check out my channel:  https://goo.gl/XBwLLc


Roasted Pumpkin Salads (in Jars)                  Servings 2 each
Ingredients:

For the Second One
Roasted pumpkin (cut into cubes) – 150g
Chopped Spring onions – 2 to 3 tblsp
Sliced cucumber – 1 small
Chopped bell peppers and capsicum – 1/3 cup
Toasted almonds – 10 to 12
Raisins – a handful
Corn chips or Nachos – 10 to 12

Salad dressing:
Extra Virgin Olive Oil – 2 to 3 tblsp
Vinegar – 1 tblsp
Worcestershire Sauce – 1 tsp
Dried basil (crushed) – 1 tsp
Dried parsley (crushed) – ½  tsp
Salt and Pepper powder – to taste


For the First One
Roasted pumpkin (cut into cubes) – 150g
Sliced onion – 1 medium
Sliced tomato – 1  large
Boiled peas – 1/3 cup
Lettuce leaves – 2 large
Root turmeric julienned – 1 tsp
Chopped green chillies – as per taste
Chopped coriander – 2 tblsp
Roasted salted peanuts – 2 tblsp
Cooked rice – 4 to 5 tblsp
Chaat masala – to taste
Salt – to taste

Salad dressing:
Oil – 2 to 3 tblsp
Skinned black lentil – 1 tsp
Mustard seeds – ½ tsp
Curry leaves – 8


Method:
1.    For the First Salad dressing, heat the oil and add in the lentils. Keep the heat on low. While that’s frying, add in the mustard seeds. Once they stop crackling, turn off the heat and add in the curry leaves. Fry them in the residual heat. Keep it aside to cool.
2.    For the Second Salad dressing, put all the ingredients in a bowl and beat well to from an emulsion. Keep aside.
3.    To make the salads, take a clean jar for each one. The jars should be of  500 ml capacity or more.
4.    Layer the ingredients in the jar in any order that you like. Pour the seasoning on top. (for the salad with corn chips, add the corn chips as the top most layer after pouring the dressing)
5.    Close the lids. Store in the fridge till its time to serve.
6.    Empty the contents of the jar in a large bowl and toss to mix well before serving the salad.

NOTE: To roast the pumpkin, cut it into thick slices with the skin. Place the pieces on a baking tray and season with salt and pepper. Drizzle with oil. Bake in a preheated oven at 200 degrees C for 20 mins or till done.
© Rinki’s Kitchen 

Monday, 28 January 2019

Thukpa Noodle Soup


Fancy a Thukpa bowl to beat the cold? Hot, spicy yet light, that’s thukpa noodle soup. A Tibetian recipe that is also popular in India.
Thukpa pronunciation is Thook Paaa, though many call it Thoop Kaa! Tongue twister for some I guess.
 
This is my vegetarian version of Thukpa. I have used vegetables that were available at home. You may use any vegetables that you like. Cauliflower, radish and coriander leaves may be included in the soup.

The stock packs in all the flavours, so add in as many varieties of vegetables (peels, heads, stalks) as you can. 

This is one soupy (rice) noodles that can be enjoyed without any guilt. The vegetarian thukpa noodle soup is actually good for health. It is really good for sore throat or common cold.
 I especially enjoy it as a meal in itself.

Click the link below to watch the video recipe:


For more such recipes, check out my channel:  https://goo.gl/XBwLLc

Thukpa Noodle Soup                      Serves 4
Ingredients:
The vegetables:
Onion (finely chopped) – 1 medium
Spring Onions (finely chopped) – 3
Bell peppers + Capsicum (finely chopped) – 4 tblsp
Green chilies (finely chopped) – 1 or 2
Ginger garlic paste – 1 tsp heaped
Button Mushrooms (chopped) – 2 to 3
Broccoli florets (chopped) – 2 to 3 tblsp
Carrots (finely chopped) – 2 to 3 tbsp
French beans (finely chopped) – 2 tblsp
Spinach (finely chopped) – 2 tblsp
Cabbage (finely shredded) – ½ cup
Lemon/Lime – 1

Tomato (paste) – 2 large
Boiled noodles – ½ cup to ¾ cup
Vegetable oil – 2 tblsp
Dark soy sauce – ½ tblsp


Dry spices:
Coriander powder – 1 tsp
Cumin powder – ½ tsp
Turmeric powder – ¼ tsp
Red chili powder – ½ tsp or to taste
Pepper powder – ½ tsp or to taste
Salt – to taste

For the vegetable stock:
Vegetable peel and leaves
Water – enough to make 500 ml stock

Method:
1.    For the vegetable stock, add the vegetable peel and leaves to a pan. Add a lot of water and boil on low to medium heat for at least an hour.       Strain and reserve the stock.
2.    Heat oil in a deep pan. Add in the onions and spring onions, sauté till light pink. Add in the bell pepper, capsicum and green chillies, sauté  till the peppers release their aroma.
3.    Add in the ginger garlic paste and cook for a minute before adding in the tomato paste. Cook briefly, add in the dry spices. Cook stirring continuously till the oil starts separating.
4.    Add in the chopped vegetables (other than the cabbage). Cook for 2 minutes then, add the cabbage. Toss it up and add in the soy sauce. Mix well before adding in the stock. (you could add plain water if you don’t have stock).
5.    Bring it to a roaring boil. Check and adjust seasoning. Add in the noodles. Cover and cook on medium heat for 3 to 5 mins. (Adjust the soup by adding more stock or water if desired). Turn off the heat. Squeeze in some fresh lime juice and mix it well.
6.    Serve hot in bowls. Sprinkle with black pepper powder and garnish with chopped spring onions.

© Rinki’s Kitchen 

Thursday, 24 January 2019

Chili Chicken .... a foolproof recipe!


How to make restaurant style chilli chicken at home? Here’s my chili chicken foolproof recipe.

The most popular Indian Chinese style chicken recipe is a hit with kids and grownups alike. You don’t have to go to a fancy restaurant to enjoy it when you can very well make it at home.

This is such a simple recipe to cook that; one would actually enjoy putting it together. The chilli part of the recipe is totally to ones taste as is the sauce. You could have it dry or gravy style depending on when you plan to serve it.

It’s a winner of a recipe that has to be tried…believe me!

Click the link below for the video recipe:


For more such recipes, check out my channel:  https://goo.gl/XBwLLc

Chili Chicken                          Serves 3 to 4
Ingredients:
Chicken breast pieces (cut into bite sized pieces) – 2
Bell peppers and capsicum (cut into triangles) – ½ cup
Onion (cut into chunky pieces) – 1 medium
Spring onions (chopped finely) – 3 to 4
Green chilies (chopped) – as per taste
Celery stalk (chopped) – 1 tblsp
Garlic (grated) – 1 tsp
Oil – for deep frying
Corn flour – 3 to 4 tblsp + 2 tsp (for slurry)
Light soy sauce – 1 tblsp (for marinade) + 2 tblsp (for the sauce)
Red chili sauce – 1 tblsp or as per taste
Vinegar – ½ tblsp
Sugar – ½ tsp
Pepper – to taste
Salt – to taste
MSG/Ajinomoto – ½ tsp (optional)

Marinate for the chicken
Light soy sauce – 1 tblsp
Garlic (grated) – 1 tsp
Synthetic vinegar – 2 tsp
Pepper – to taste
Salt – to taste

Method:
1.    Marinate the chicken pieces for an hour (with Marinate for the chicken).
2.    Add in 3 to 4 tblsp of corn flour to the chicken pieces and coat them well. Deep fry till crispy. Drain on absorbent paper and keep aside.
3.    Make slurry with 2 tsp corn flour and ½ cup of water. Keep aside.
4.    Add 2 to 3 tblsp of the oil in which the chicken was fried to a sauce pan. Add in the celery to the hot oil. Give it a mix and add garlic. Fry briefly. Add in the onions, bell peppers and green chilies.
5.    Stir fry for ½ a minute. Add in the red chili sauce, light soy sauce, salt and pepper. Mix together to coat the veggies. Now, add in the fried chicken pieces. Mix well to coat with the sauce.
6.    Add in the spring onions (reserve some for garnish), sugar and the MSG. Cook briefly till the sugar melts before adding slurry. Bring it to a boil stirring continuously.
7.    Adjust the consistency by adding more water if required. Or add more slurry to get a thicker sauce. Once the sauce thickens to desired consistency, turn off the heat. Add in a tablespoon of vinegar and mix thoroughly.
8.    Garnish with chopped green chilies and spring onion. Serve hot with rice or noodles.
© Rinki’s Kitchen 

Monday, 21 January 2019

Crispy Corn Triangles .... tortilla chips


Who doesn’t like to munch on crispy corn triangle chips or tortilla chips? I am sharing my recipe of healthy corn chips all made from scratch.

These chips can easily replace the store bought packets for a healthier option. Nothing can beat homemade food.

I have tried several recipes over the years but for me this is the best one that I came up with. It has been with me for many years now.

The most important part of the recipe is to get the flat bread or tortilla rolled out as thinly as possible.
First cooking it on the griddle and then frying makes the chips soak up less oil. While frying, the only point to be kept in mind is to regulate the heat.

So, even though deep fried, the tortilla chips, are not oily at all.

Click the link below for the video recipe:

For more such recipes, check out my channel:  https://goo.gl/XBwLLc


Crispy Corn Triangle Chips           Makes about 128 triangles
Ingredients
Cornmeal – 2 cups
Caraway seeds – a pinch
All purpose flour – 1 cup
Baking powder – 1 tsp
Salt – to taste
Hot water for kneading – ¾ to 1 cup
Vegetable oil – 1 tblsp + for deep frying

For the Cheese topping
Processed cheese – as required (grated)
Mozzarella cheese – as required (grated)
Chili flakes – to taste
Roasted cumin powder – to taste

Method:
1.    Mix the two flours, season with salt. Add in the baking powder. Crush the caraway seeds by hand and add them in. Mix well.
2.    Add in 1 tblsp of oil and mix it in. Knead the dough by adding hot water a little at a time to get a smooth dough. Cover and rest the dough for 10 to 15 mins.
3.    Make small balls from the dough (about 16) and roll out each to a thin circle with a little sprinkling of flour. Use a fork to prick the rolled out circle all over.
4.    Cook the flat bread on a hot griddle on each side briefly. Keep aside. Similarly cook the rest. Take stacks of 3 or 4 flat breads at a time and cut them into 8 wedges or triangles using a knife or a pizza cutter.
5.    Deep fry the triangles in medium hot oil till they are golden and crispy. Drain on absorbent paper. Once cooled completely, store in an airtight box.
6.    To serve, arrange the chips on a plate and sprinkle grated cheese of your choice on top. I like to use processed cheese and mozzarella. Microwave on high till the cheese melts. Sprinkle some chili flakes and roasted cumin powder on top. Serve immediately.
7.    The chips may be served plain or with a dip or chutney.
© Rinki’s Kitchen 


Thursday, 17 January 2019

Pierogi Dumplings without eggs


Pierogi dumplings are the most popular Polish dumplings and find a place in my recipe diary. I just love to make and eat them!

There are several Pierogi recipes from sweet to savory. The meat Pierogi recipe is very popular as is the potato Pierogi. The fruit filled Pierogi are not far behind though.

This is an eggless recipe and features two types of savory filling…. The potato filling and the mushroom filling.

The recipe has 3 parts…the dough, the filling and the assembly of the Pierogi. The dumplings may be served boiled but if you go a step further and fry them, then they become nice golden and crispy too.

For more such recipes, check out my channel:  https://goo.gl/XBwLLc

Pierogi Dumplings                          Makes 30 to 32
Ingredients:

For the DOUGH
All purpose flour – 2 cups
Vegetable oil – 1 ½  tblsp
Salt – 1 tsp
Hot water – ½ cup + a little extra

For the CARAMELIZED ONIONS
Onions (finely chopped) – 4 medium
Oil – 2 tblsp
Salt – ¼ tsp

For the MUSHROOM FILLING
Button mushrooms (chopped finely) – 1 ½ cups
Shitake mushrooms (hydrated and chopped finely) – ¾ cups
Caramelized onions -  about 2 tblsp
Garlic (chopped finely) – 4 to 5 cloves
Pepper powder and Salt – to taste
Chili sauce – 1 tsp
Oil – 1 tblsp

For the POTATO FILLING
Boiled potatoes – 4 medium
Chives or onion greens (chopped) – 1 tblsp
Fresh cream – 2 tblsp
Caramelized onions – 1 tblsp
Salt and pepper – to taste
Cheese (grated) – 2 tblsp

To cook the PIEROGI
Water – in a large pan
Oil + Butter – for frying

Method:
1.    Take the flour in a large bowl and add in the salt and oil. Mix well. Add in ½ cup of hot water and mix well. If needed add in 1 to 2 tblsp of extra water and knead to form a smooth dough. Cover and keep aside for 10 to 15 mins.
2.    To make the caramelized onions, heat the oil and cook the onions on medium heat. Add salt and cook till they are lightly caramelized. Keep aside.
3.    TO make the mushroom filling. Heat oil in a pan and add in the caramelized onions and garlic. Cook briefly. Add in the mushrooms and season with salt and pepper. Cook till the mushrooms become tender. Add in the chili sauce. Mix well. Keep aside.
4.    To make the potato filling, mash the potatoes while still hot. Add in some chopped chives or onion greens, fresh cream, caramelized onions and grated cheese. Season with salt and pepper. Mix to combine thoroughly.
5.    To make the Pierogi, knead the rested dough lightly. Divide it into 3 parts and form balls. Roll out each ball very thinly. Use a cookie cutter or a bottle cap of 3 inch diameter to cut out circles.
6.    Place sufficient amount of filling at the center of each circle. Fold in half to form a half moon shaped dumpling. Press the edge to seal it then pinch or press with your fingers to give it a scalloped finish. You could use a fork to press and seal the edge as well.
7.    Boil water in a large pan, season  it with salt. Once the water comes to a roaring boil, drop in the dumplings one by one. They will sink at first and then float to the top. Once all of them float up to the top, cook for a minute and then take them out.
8.    Heat some oil and butter in a pan. Fry the Pierogi on both sides till golden and crispy.
9.    Sprinkle with chopped chives or onion greens. Serve with caramelized onion and a yogurt dip.
© Rinki’s Kitchen 

Monday, 14 January 2019

Honeycomb Hokey Pokey Recipe


If you want to have fun with sugar, then honeycomb or hokey pokey recipe it is. This is the recipe for an old fashioned puff candy.

Made with just 3 or 4 ingredients, this honeycomb toffee is used in many ways. It is often used to flavour ice creams and cakes. The hokey pokey ice cream is just delicious.
You could serve the hokey pokey with a hot cup of coffee or even dip it into chocolate for an indulgent treat.

The honeycomb is formed when the baking soda reacts with the melted caramel to form a fluffy foamy cloud. Once cooled, the caramel toffee hardens and traps the air bubbles inside. This is how the honeycomb texture is formed.

Only important thing to remember is that the toffee is extremely hot and care should be taken to handle it.

Click the link below for the video recipe:


For more such recipes, subscribe & check out my channel:  https://goo.gl/XBwLLc


Honeycomb or Hokey Pokey                  Serves    many
Ingredients:
Castor sugar or Superfine sugar – 1/2 cup
Honey or Golden syrup – 4 tblsp
Baking soda – 1 ½ tsp
Water – ½ tblsp

Method:
1.    Prepare a silicon mat by placing it on a metal tray or on your kitchen counter (made of granite or marble). You could directly grease the marble or granite top or use a greased tin or a greased steel plate. Do this before you begin making the toffee.
2.    Take a deep, thick bottom pan to make the toffee. Add in the sugar, honey and water. Mix thoroughly.
3.    Place the pan on medium heat and stir till the sugar dissolves. Remove the spatula. No more stirring now.
4.    Cook this on medium heat till the melted liquid looks dark like Maple syrup. This should take 2 to 3 mins. Remove it from the heat at once. DO NOT OVERCOOK.
5.    Add the baking soda all at once. Use a wire whisk and mix it in vigorously and thoroughly. The caramel will foam up.
6.    Pour it over your prepared surface. Be careful as the fluffy toffee will be extremely hot at this stage. Let it rest for 1 hour at least.
7.    It will harden once cooled completely. Cut it or break it into smaller pieces and store it in an airtight container.
8.    Serve the hokey pokey with hot coffee or use it as an ice cream topping. Goes well with cakes too.

© Rinki’s Kitchen 

Thursday, 10 January 2019

Chicken Drumstick Curry with chutney


A tangy chicken drumstick curry made with green chutney and steaming hot rice can be the perfect meal on a cold day.

Again, this is a simple recipe with readily available ingredients. I find that making chutney with all the fresh ingredients, results in smooth gravy.

Green chilies, coriander leaves and lemon are good sources of vitamin C. These ingredients make the curry perfect for a cold day. It is actually good for someone who has the cold!

Click the link below for the video recipe:


For more such recipes, subscribe & check out my channel:  https://goo.gl/XBwLLc

Chicken Drumstick Curry with green chutney                    Serves 2 to 3
Ingredients:
Chicken drumsticks – 5 to 6
Potato – 1 large or 2 small (cut into chunks)
Onion – 1 large (chopped finely)
Mustard oil – 4 tblsp
Garam masala powder – ½ tsp
Coriander powder – 1 tsp
Cumin powder – ½ tsp
Turmeric powder – 1/3 tsp
Green chilies – 2 (slit)
Salt – to taste
Butter – 1 tblsp

For the marinade
Ginger garlic paste – ½ tblsp
Vinegar – 1 tblsp
Red chilli powder – ½ tsp
Garam masala powder – ½ tsp
Salt – ½ tsp

For the green chutney
Tomato – 2 medium
Coriander leaves – a small bunch
Garlic cloves – 4
Green chilies – 2
Lemon – ½ (squeezed)
Sugar – ½ tsp
Salt – ½ tsp


Method:
1.    Wash and clean the chicken drumsticks. Make 2 slits on each of them.
2.    Mix all the ingredients for the marinade. Pour this over the chicken pieces. Rub the marinade on to the chicken drumsticks. Leave aside for at least an hour.
3.    Roast the tomatoes on a naked flame till charred completely. Rub the skin to remove it. Wash it with water and chop it roughly.
4.    Chop up the rest of the ingredients for the green chutney. Squeeze in the lemon. Grind them to a fine paste.
5.    Heat a tablespoon of mustard oil in a shallow pan. Fry the chicken drumsticks till they get a nice colour on the outside. Let them rest for 5 to 10 mins.
6.    In a deep pan, heat 3 tblsp of mustard oil. Fry the potato till they are golden in colour. Remove and keep aside. Fry the onion till they are golden brown.
7.    Add in the left over marinade into the pan and cook till oil separates. Next add in the green chutney and cook till the oil starts separating.
8.    Put the potato pieces back into the pan and cook with the masala for a minute. Add in the chicken drumsticks and cook on medium heat for a minute or two.
9.    Now, cover and cook on low heat for 2 mins.  Add in 2 to 3 cups of water into the pan and bring to a boil. Season it to taste. Add in some slit green chilies. Cover and cook on low heat till the chicken and potatoes are done. Add in a tablespoon of butter. Sprinkle some garam masala powder and mix well. Cook till the butter has melted completely.
10. Sprinkle some garam masala powder on top and serve the curry with steaming hot rice.
© Rinki’s Kitchen 

Monday, 7 January 2019

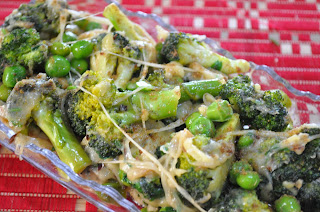
Cheesy Broccoli Florets


Broccoli florets cooked with cheese tastes yummy. It hardly takes any time to cook.
This is my mom’s recipe. She loved cooking it with fresh broccoli from her kitchen garden.

I have used 2 cheeses for this recipe. You may use more cheese types in yours or go with only one.
Just the combination of cheese, broccoli and garlic is devine!

While cooking, take care not to overcook the broccoli. The stalk should retain a slight crunch.
Serve this as an appetizer or snack. You could even use it as filling for sandwich.

Click the link below for the video recipe:


For more such recipes, subscribe & check out my channel:  https://goo.gl/XBwLLc

Cheesy Broccoli Florets                 Serves 3 to 4
Ingredients:
Broccoli – 250 g (cut into florets)
Sweet peas – ½ cup (shelled)
Coriander leaves – 1 tblsp (chopped)
Processed Cheese – ¼ cup (grated)
Mozzarella Cheese – ¼ cup (grated)
Cumin seeds – ½ tsp
Roasted cumin powder – 1 tsp
Garlic – 2 to 3 cloves (chopped finely)
Red chili flakes – to taste
Olive oil – 1 tblsp
Butter – 1 tblsp
Salt – to taste

Method:
1.    Wash the broccoli florets with boiling hot water. Drain and keep aside.
2.    Heat the oil in a pan. Add in the butter. Once the butter has melted, temper with cumin seeds.
3.     Lower the heat and add in the garlic and the chili flakes. Cook briefly. Add in the broccoli. Cook stirring continuously for ½ a minute. Add in the peas. Season with salt. Give it a mix.
4.    Cover and cook on low medium heat. Stir it from time to time. Cook till the broccoli is almost done. DO NOT overcook.
5.    Add in some chopped coriander leaves and the cheese. Mix thoroughly. The cheese should melt into the broccoli florets. Turn off the heat.
6.    Sprinkle the cumin powder on top and serve it hot as an appetizer or starter. Goes well as a sandwich filling too.

© Rinki’s Kitchen