Monday, 12 August 2019

How to make Shahi Tukda with Suji Kheer


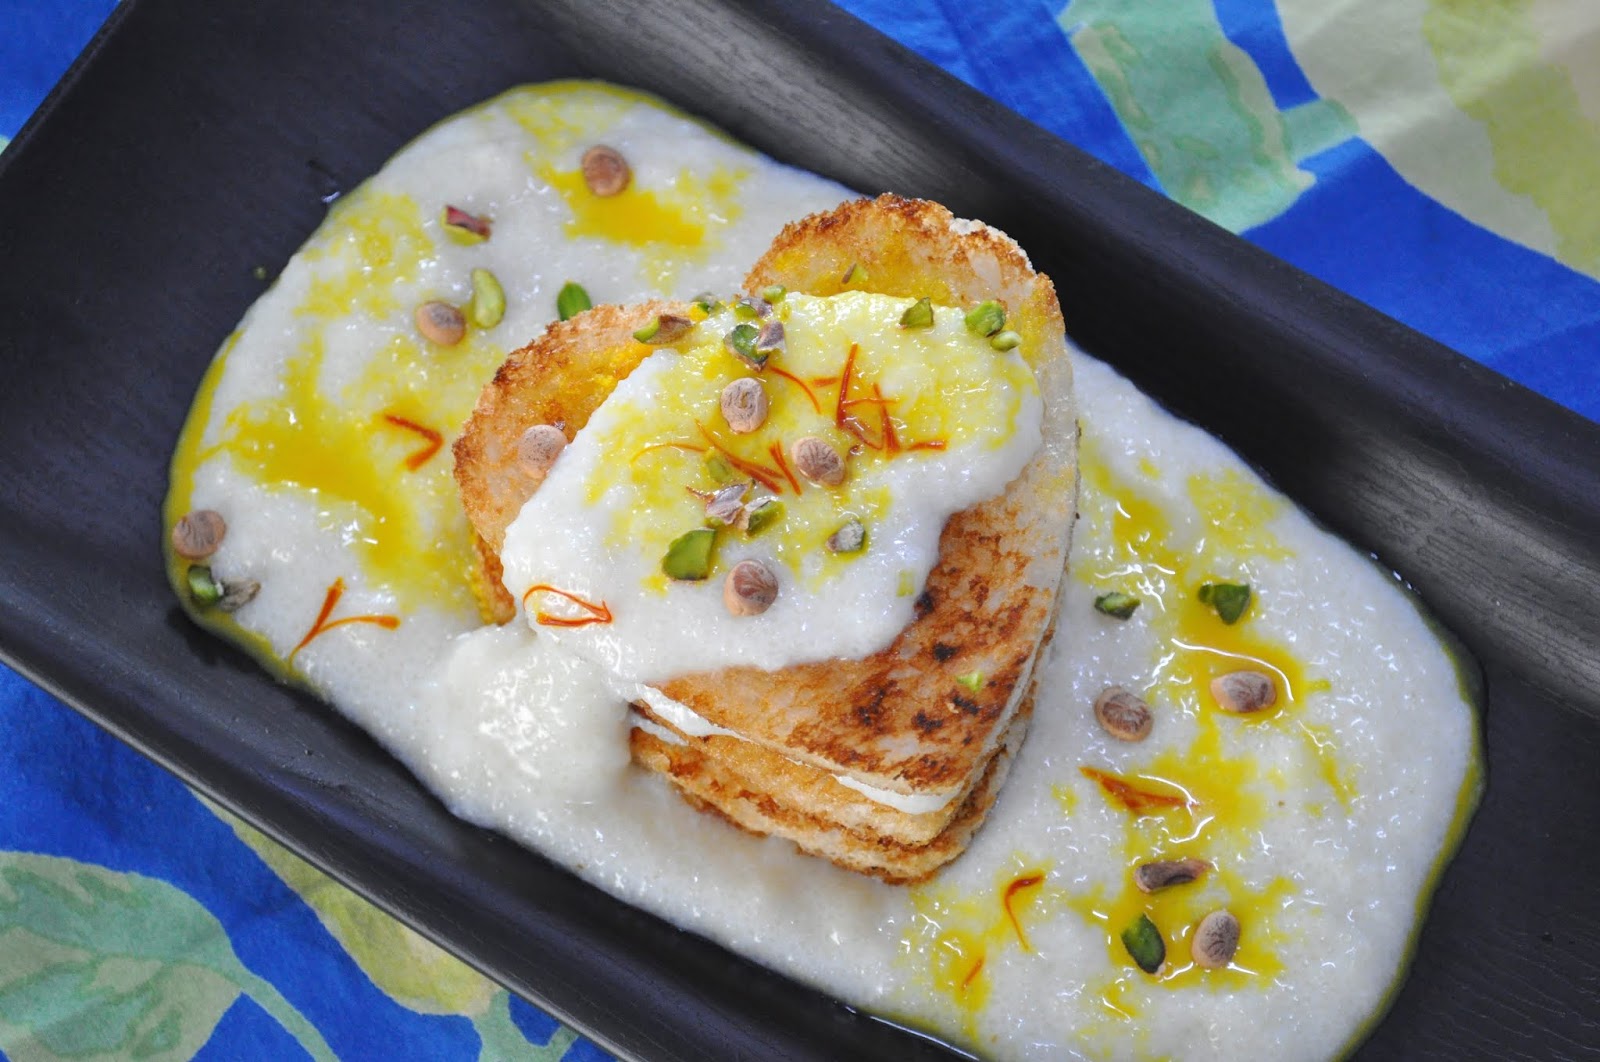
Sometimes all you need to do is put a little twist to a recipe and you have something different and new to try out! My suji kheer shahi tukda recipe is super simple and light too…
For more such recipes, check out my channel:  https://goo.gl/XBwLLc

Learn how to make shahi tukda with suji kheer in no time at all. A simple method with readily available ingredients makes this a recipe for beginners and experts alike. A non fuss shahi tukda recipe and a super easy rava kheer (semolina pudding) recipe…it’s actually 2 recipes in one.

Make it for a special occasion or a regular day celebration.


Click the link below for the video recipe:


Suji Kheer Shahi Tukda                 Serves 4 to 5

FOR THE SUGAR SYRUP
Water – 1 cup
Sugar(powdered) – ¼ cup
Green Cardamom(crushed) – 3

FOR THE SHAHI TUKDA
Bread slices – 2 per serving
Ghee – for shallow frying

FOR THE SUJI KHEER
Suji/Semolina – 1/3 cup
Milk – 500 to 600 ml
Condensed milk – ¼ cup
Sugar – ¼ cup
Ghee – 1 ½ tblsp
Essence of Kewra – a few drops

FOR GARNISH
Mixed chopped nuts – 2 to 3 tblsp
Saffron soaked in hot milk

Method:
1.    FOR THE SUGAR SYRUP: Bring the water to a boil and add in the sugar. Dissolve completely. Add in the cardamoms and simmer on medium heat till reduced to half. Cool completely.
2.    FOR THE SHAHI TUKDA: Cut the bread slices in ½ or ¼ or use a cookie cutter to cut it into a shape. Heat some ghee in a pan and shallow fry the pieces till golden brown and crispy. Drain on absorbent paper and let cool.
3.    FOR THE SUJI KHEER: fry the suji in the ghee till it becomes light golden in colour. Add in the milk and cook stirring on low heat till the mixture starts to thicken. Add in the condensed milk and sugar. Dissolve completely. You may add in a pinch of salt. Mix well and turn off the heat. Let it cool down completely. Once cold add in a few drops of Kewra essence and mix it in.
4.    To assemble the dessert, add a layer of kheer at the base of the serving dish.
5.    Place a fried bread piece on it and drizzle it with the sugar syrup. Pour some kheer over it and sprinkle some chopped nuts. Place another slice of bread and continue to build it in the same way. (You could use 2 or 3 slices for one serving). End with kheer on top.
6.    Sprinkle the chopped nuts all over, drizzle the saffron milk all over. Garnish with the strands of saffron. Leave aside to rest for 15 to 20 mins and serve.
© Rinki’s Kitchen

Thursday, 8 August 2019

Sweet Corn Ki Kachori


Monsoon, sweet corn and craving for hot kachoris… I have combined them all in this Sweet Corn Ki Kachori recipe!
For more such recipes, check out my channel:  https://goo.gl/XBwLLc

Khasta Kachori as the name suggests is flaky and crispy on the outside and has a spicy filling inside. In this Sweet Corn Kachori, the filling is made with spices typically used for kachori stuffings. Mashed potato is used to bind the corn kernels together.

The main part of the recipe is the frying of the kachoris.  A mildly hot oil and lots of patience is required to cook the kachoris perfectly. Then they turn out to be very flaky and do not absorb the oil.

This will turn out to be a family favourite ….do try the recipe and post your feedback in the Comments section below.


Click the link below for the video:


Sweet  Corn Ki Kachori                           Makes 12 Kachoris

FOR THE STUFFING                                                                     
Sweet Corn kernels (boiled) – 200g                                            
Finely chopped onions – 2 to 3 large                                      
Boiled and grated potato – 2 large                                          

FOR THE DOUGH
Plain Flour - 2 cups
Caraway seeds/Ajwain – ¼ tsp
Vegetable oil - ¼ cup
Ghee /Clarified butter – 1 tblsp
Salt – to taste      
Chilled water – ½ cup
                                                                                                                                                                                                                                                                                                                                               
WHOLE SPICES
Fennel seeds – ¾ tsp
Coriander seeds – ¾ tsp
Cumin seeds – ½ tsp

DRY SPICES
Coriander powder – 1 ¼ tsp
Chaat Masala powder – 1 tsp
Garam Masala Powder – ½ tsp
Turmeric powder – ¼ tsp
Red chili powder – ½ tsp or to taste
Salt – to taste

OTHER SPICES
Asafoetida /Hing – ¼ tsp
Grated ginger – 1 tsp
Chopped coriander – 1 tblsp
Chopped green chilies – as per taste
Vegetable oil – 2 tblsp


Method:
1.    Dry roast the WHOLE SPICES. Cool slightly and then grind coarsely.
2.    Heat vegetable oil in a pan and add in 1 ½  tsp of the ground  WHOLE SPICES. Cook briefly.
3.    Add in the asafetida/hing. Mix in into the oil. Add in the onions and cook for a minute.
4.    Add in the grated ginger and DRY SPICES. Mix well with the onions and cook on medium heat till the onions become soft.
5.    Next add in the corn. Cook for about 2 mins and them mash them up slightly. Mix well. Add in the grated potato and mix well. Check the seasoning and adjust it. Sprinkle the coriander and green chilies. Mix again, turn off the heat and let it cool down to room temperature.
6.    FOR THE DOUGH, mix together the flour, salt(to taste) and crushed caraway seeds. Pour in the oil and ghee. Mix well and using your hands rub in the oil and ghee into the flour.
7.    Make a soft dough using the chilled water till just combined. Cover and rest the dough for 15 to 20 mins. Knead lightly after resting. Divide the dough into 12 balls.
8.    Make 12 balls roughly the same size as the dough balls with the filling.
9.    Take a dough ball and shape it into a bowl with a thin edge.  Place the filling in the centre and carefully cover it with the dough. Pinch to seal. Roll into a ball and flatten slightly with your palm. Similarly, make the rest of them.
10. Deep fry the kachoris in mildly hot oil till they turn golden and crispy.
11. Serve with a spicy green chutney.
© Rinki’s Kitchen

Monday, 1 July 2019

Stuffed Parwal Curry ... no onion no garlic recipe


Potoler Dolma is a Bengali delicacy said to be derived from the Armenian cuisine. Watch how to make paneer stuffed parwal curry the easy way!
For more such recipes, check out my channel:  https://goo.gl/XBwLLc

This paneer stuffed parwal curry has no onion no garlic it is a vegetarian recipe. Though the Dolma is usually made with fish or meat filling, the vegetarian versions often have paneer or lentils in them.
The gravy for the paneer stuffed potoler dolma is made spicy and is usually rich and thick. Usually served with rice or pulao this recipe goes well with puri or paratha too.


Click the link below for the video:


Paneer Stuffed Parwal Curry (Veg Potoler Dolma)                    Serves 4
Ingredients
Parwal/Potol/Pointed gourd – 8
Thick paste with plain flour – 4 tsp flour + enough water
Oil – for deep frying the gourds

FOR THE STUFFING
Paneer – 120 g or as required
Cashew nuts (chopped) – 2 tblsp
Raisins/Kishmish (soaked and chopped) – 2 to 3 tblsp
Garam masala pdr – ½ tsp
Red chili flakes/ Chopped green chili – to taste
Salt – to taste

FOR THE GRAVY
Coriander powder – 1 ½ tsp
Cumin powder – ¾ tsp
Garam masala pdr – ½ tsp
Kashmiri red chili powder – ½ tsp
Haldi powder – ½ tsp

Oil from frying – 2 to 3 tblsp
Cumin seeds – ¼ tsp
Bay leaves – 2 small or 1 large
Cinnamon stick - 1
Tomato paste – 1/3 cup
Ginger grated/paste – 1 tsp
Green chilies – chopped to taste and whole
Sugar – 1 tsp
Salt – to taste

Method:
1.    Wash the gourds and scrape the outer skin with a knife. Slice off one end from each. Cut two opposite thin stripes along the length. Use the back of a spoon to carefully scoop out the seeds from all the gourds.
2.    Mix all the ingredients FOR THE STUFFING. Fill the parwals/gourds with the stuffing. Reserve the leftover if any.
3.    Make the thick paste with plain flour and water. Dip the open end of the gourd in this paste to coat them. Deep fry the parwals/gourds briefly to seal the open ends.
4.    In a bowl, add in the powdered spices FOR THE GRAVY. Add in ½ cup of water and make a thin paste. Keep aside.
5.    Heat the 2 tblsp of oil (from frying) in a fresh pan. Temper with the cumin seeds, bay leaves and cinnamon.
6.    Lower the heat and add in the spice paste. Add in the tomato paste. Cook till oil separates.
7.    Add in the ginger and chopped green chilies. Season with salt and sugar. Mix well and add in 2 whole green chilies. Cook briefly before adding a cup of water. (You may add in any leftover filling to the gravy) Bring it to a boil, lower the heat and place the stuffed parwals in the pan. Cover and cook for 5 to 7 mins on low heat.
8.    Remove the lid and turn the parwals over. Drizzle with the gravy and cover again to cook until done. If required add a little water and bring to a boil to get a thick gravy.
9.    Serve hot with rice or pulao. Goes well with puri or paratha too.
© Rinki’s Kitchen

Thursday, 27 June 2019

Mint and Feta Salad


How about a flavourful mint and feta salad? One of my absolute favourite combination for a salad.
For more such recipes, check out my channel:  https://goo.gl/XBwLLc

Adding feta cheese to a salad makes it so much special. Not to forget the protein content!
This vegetarian feta cheese salad is inspired by the Greek salad though I have put my own Indian twist to it. The combination of mint and feta (in the salad) goes extremely well with all the other ingredients.

A few points to remember:
1.    Always keep the prepared ingredients covered in the fridge till its time to serve.
2.    Add the dressing to the salad body right before serving.
3.    Add only enough dressing to coat the salad and no more.

Serve this feta cheese and veggie salad as an appetizer or as a meal in itself!

Mint and Feta Salad                        Serves 2 to 3
Ingredients:
FOR THE DRESSING:
Extra virgin olive oil – 1/3 cup
Lemon juice – 1 tblsp
Garlic pickle – 1 tsp
Maple syrup or honey – 1 tsp
Red chili flakes – ¼ tsp
Salt & Pepper – to taste

FOR THE BODY OF THE SALAD:
Feta cheese – 50g (cut into small cubes)
Mint leaves – a handful
Cherry tomatoes – 8 to 10 (halved)

Ripe Mango cubes – 3 tblsp
Baby cucumber – 4 (sliced lengthwise)
Pickled shallots or baby onions – 5 to 6 (halved)
Pickle olives – 4 to 6 (sliced)
Moong sprouts – 1/3 cup

Method:
1.    Take a clean small glass jar. Add in all the ingredients FOR THE DRESSING. Close the lid tightly and give it a good shake till the dressing turns slightly thicker. Keep aside.
2.    Take all the ingredients FOR THE BODY OF THE SALAD  in a large bowl (except for the feta cheese and cucumber slices). Keep them covered in the fridge till it’s time to assemble the salad.
3.    Just before serving, give the dressing a final shake. Drizzle it over the prepared salad so that it’s enough to coat them and NO MORE. Mix gently.
4.    Line a plate with the cucumber slices (like rays of the sun). Place the prepared salad in the middle.
5.    Arrange the feta cubes randomly on the salad. Drizzle some dressing on the cucumber slices. Serve immediately.
© Rinki’s Kitchen

Monday, 24 June 2019

Mango Pickle without oil recipe...


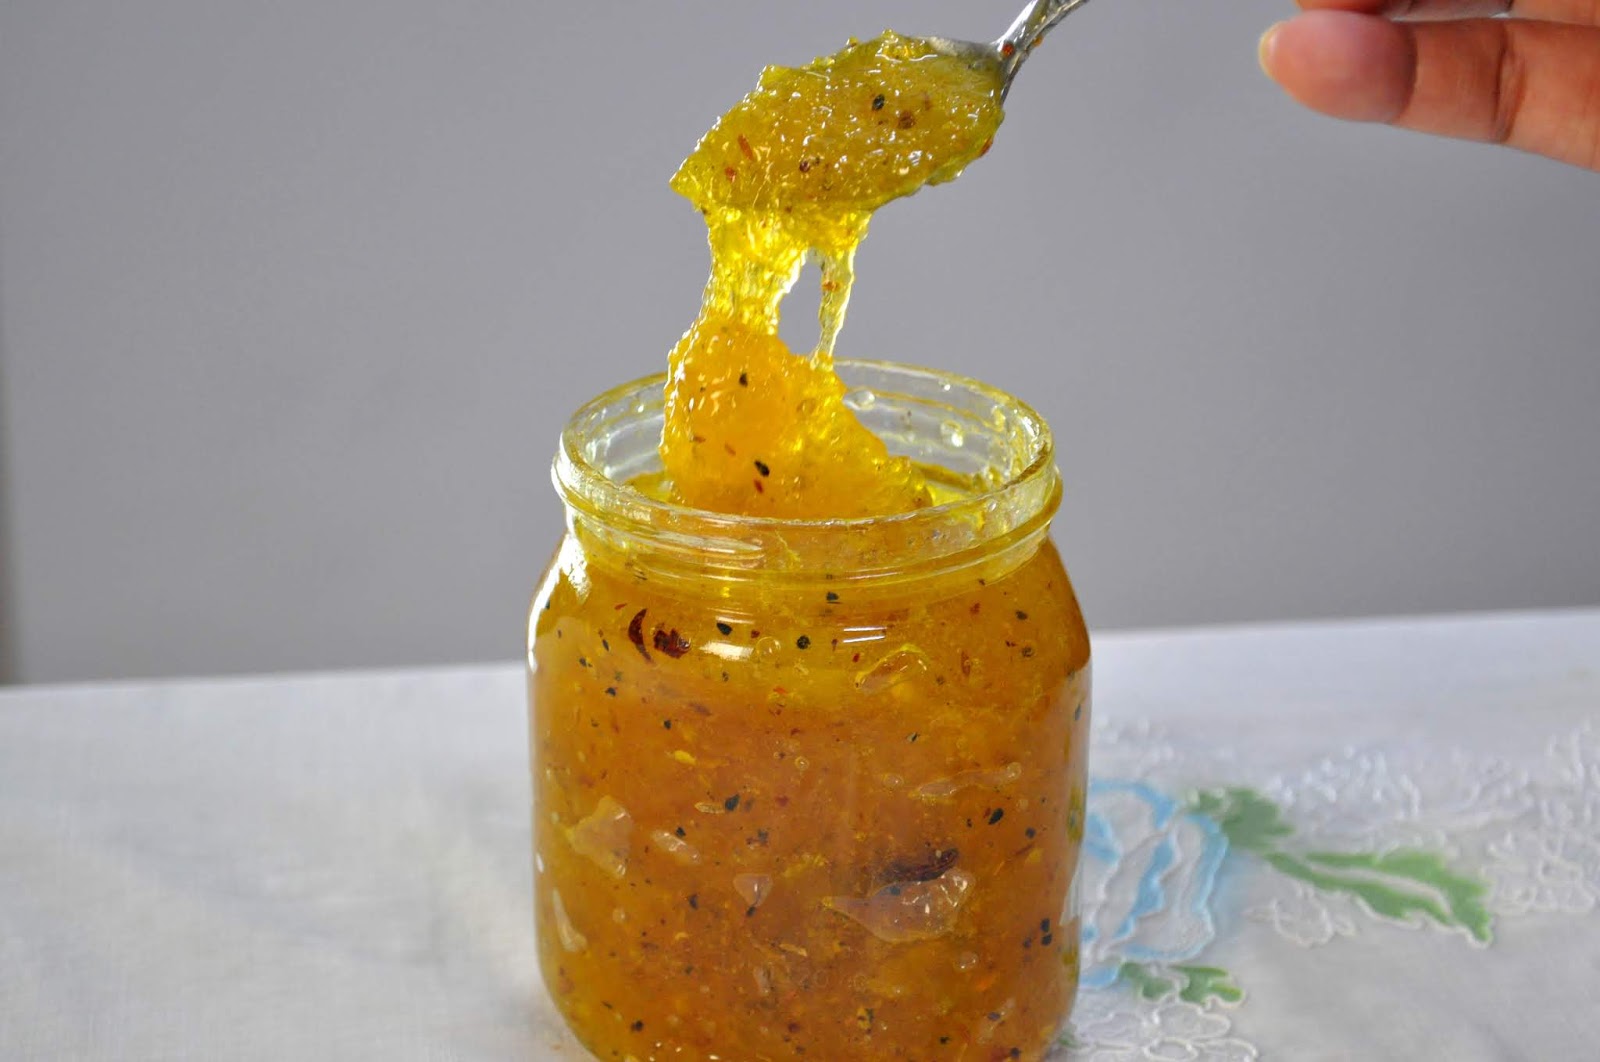
How about a Mango Pickle without oil recipe that perfectly preserves the intense flavor of mangoes? It’s an easy recipe that anyone can try out.
For more such recipes, check out my channel:  https://goo.gl/XBwLLc

With the mango season coming to a close, I thought it best to preserve some (raw mangoes) by making this mango chutney no oil recipe.
Just a handful of ingredients is all that is required.

The most important point to remember … NO MOISTURE!
Everything you use must be clean and dry including your hands.

I like to adjust the sugar according to the mangoes. Some are really tart. At the end it all comes down to your taste.
The sweet and tangy pickle or chutney can be used as a spread, served with any meal or had straight from the jar. So even though it will stay good for several months, you may run out of it much earlier than that 😊

Try the recipe…it smells mouth watering!

Note: It goes very well with puri or paratha.

Click the link below for the video:


Mango Pickle (without oil recipe)            Makes about 300g
Ingredients:
Raw mango – 500g
Sugar – 1 ½ to 2 cups or as per requirement
Salt – ¾ tsp
Cinnamon – 1 stick
Panch Foran – ¾ tsp (mix of cumin, fennel, mustard, fenugreek and onion seeds)

Dry spices:

Turmeric/Haldi powder – ½ tsp
Asafoetida/Hing – a pinch
Red chili flakes – ½ tsp

Method:
1.    Soak the mangoes in water for half an hour. Scrub to clean the sap. Wash thoroughly and drain the water. Wipe them dry with a clean cloth.
2.    Peel the mangoes and remove the flesh. Discard the seed. Chop them up into small pieces.
3.    Dry roast the panch foran (Bengali five spices) till it releases the aroma. Cool completely. Once cooled, crush coarsely.
4.    Heat a pan on low medium heat. Add in the chopped mangoes followed by ½ cup of sugar, ¾ tsp of salt and the stick of cinnamon. Mix well. Leave it till the sugar has melted completely.
5.    Add in the dry spices. Mix well. Let it simmer on low heat till the mango pieces look translucent or slightly cooked. Taste the dish and add more sugar if needed ¼ cup at a time. Let the sugar melt. Taste again and add more if required to get the desired taste.
6.    Keep cooking on low heat and mix it from time to time till it takes on a jam or thick chutney like consistency.
7.    Turn off the heat and sprinkle the crushed panch foran over it. Mix well and let it cool completely.
8.    Fill the cooled chutney into a sterilized jar. Store in a dry place. Enjoy the pickle for several months to come!

© Rinki’s Kitchen

Thursday, 20 June 2019

Thick Ice Cream Milkshake Coolers


Thick milkshake ice cream coolers can be a real treat on any day ….if you don’t mind the calories. This is a quick and easy thick shake recipe with ice cream that can be served up with three flavor combinations!
For more such recipes, check out my channel:  https://goo.gl/XBwLLc

I have used the seasonal mango (my favourite fruit) as the main flavor. You could try out different flavours too.

It’s always good to have variety!

Click the link below for the video recipe:


Thick Ice cream Milkshake Coolers with mango                Makes 3 large glasses
Ingredients
For the shake:
Chilled Mangoes – ½ cup chopped roughly
Sugar – 3 to 4 tsp
Chilled Milk – 1 ½ cups
Mango Ice cream – 4 to 5 scoops
Vanilla Ice cream – 1 to 2 scoops
 
For flavouring:
Strawberry preserve – 2 tblsp
Bloomed Chia seeds – 2 to 3 tsp
Coconut cream – 4 tsp
Whipped cream – 1 tblsp
Finely cubed mangoes – 2 tsp

For the finishing:
Whipped cream – ½ cup
Finely cubed mangoes – for garnish


Method:
1.    For the shake: Make a smooth paste of mangoes, sugar and a little milk in a mixie jar. Add in the rest of the ingredients and mix to form a smooth shake. Keep it in the fridge.
2.   Keep the glasses in the fridge for at least half an hour.
3.    Take out the glasses, to the first glass add in a tablespoon of melted strawberry preserve (melt it in the microwave with a few drops of water). Smear it on the bottom and lower part of the glass. Take some more preserve and smear a band near the top of the glass. Put it back in the fridge.
4.    To the second one, add in the bloomed chia seeds and a few pieces of the cubed mango at the bottom. Put it back in the fridge.
5.    For the third one, mix the 2 tsp coconut cream with the whipped cream. Add it to the glass and smear it at the bottom. Put it back in the fridge.
6.    Right before serving, take out the glasses and the shake. Pour the shake into each glass.
7.    Top it with some whipped cream. Add some strawberry preserve to the first glass,  some chia seeds to the second glass and some coconut cream to the third glass.
8.    Finally garnish with the mango cubes and serve immediately.
© Rinki’s Kitchen

Thursday, 2 May 2019

Jackfruit Curry in pressure cooker!


A spicy Jackfruit Curry (in pressure cooker) can very well be called a vegetarian meat curry! It (Kathal) is one of my most favourite vegetables and I especially like the tender ones.
For more such recipes, check out my channel:  https://goo.gl/XBwLLc

So, when tender Jackfruit is in season, this is one of the curries that I love to cook. It is best to cook the jackfruit curry in the pressure cooker. This allows the vegetable to cook perfectly tender.

Rice or any bread goes well with this curry. Watch how to cut whole jackfruit and cook it into a delicious curry.

Click the link below for the video:


Jackfruit Curry (in pressure cooker)        Serves 4
Ingredients:
Raw/ Tender Jackfruit(cut into 1 inch cubes) – 350 g
Tomato puree – 1/3 cup
Mustard oil – 3 tblsp + for frying
Cumin seeds – ¼ tsp for tempering
Onion – 1 large into paste
Sugar – 1 tsp
Salt – to taste
Coriander leaves – to sprinkle on top

SPICE POWDER
Chaat masala – ¾ tsp
Turmeric powder – ½ tsp
Kashmiri red chilli powder – ½ tsp

SPICE PASTE
Ginger – 1 inch
Garlic – 5 to 6 cloves
Green chillies – as per taste
Roasted Cashew nuts – 7 to 8

For Dry Roasting
Coriander seeds – 2 tblsp
Cumin seeds – ¾ to 1 tblsp
Black cardamom – 2
Green cardamom – 4 to 5
Cloves – 2 to 3
Black pepper corns – 8 to 10
Cinnamon sticks – 1 inch

Method:
1.    Cut the jackfruit into 1 inch cubes. Wash and keep aside.
2.    For Dry Roasting, take a pan and add in the spices. Roast them on low to medium heat stirring continuously till they release their aroma. Take off the heat and cool completely.
3.    In a mixie jar take the ingredients for the SPICE PASTE and the dry roasted spices. Add enough water and grind to a smooth thick paste.
4.    Shallow fry the jackfruit pieces and keep aside.
5.    In a pressure cooker, add in 3 to 4 tblsp of mustard oil and temper it with cumin seeds. Add in the onion paste and cook till it turns light brown.
6.    Add in the SPICE POWDER(s) and cook briefly before adding in the tomato paste. Cook till oil starts separating. Add in the sugar and a cup of water. Bring to a simmer.
7.    Add in the fried jackfruit. Season with salt and mix lightly. Bring to a simmer again. Add in more water to just cover the jackfruit pieces. Close the lid and let it pressure cook on medium heat for 2 whistles or until the jackfruit is cooked and tender.
8.    Sprinkle with fresh coriander leaves and serve hot with rice or chapati.
© Rinki’s Kitchen