Thursday, 27 June 2019

Mint and Feta Salad


How about a flavourful mint and feta salad? One of my absolute favourite combination for a salad.
For more such recipes, check out my channel:  https://goo.gl/XBwLLc

Adding feta cheese to a salad makes it so much special. Not to forget the protein content!
This vegetarian feta cheese salad is inspired by the Greek salad though I have put my own Indian twist to it. The combination of mint and feta (in the salad) goes extremely well with all the other ingredients.

A few points to remember:
1.    Always keep the prepared ingredients covered in the fridge till its time to serve.
2.    Add the dressing to the salad body right before serving.
3.    Add only enough dressing to coat the salad and no more.

Serve this feta cheese and veggie salad as an appetizer or as a meal in itself!

Mint and Feta Salad                        Serves 2 to 3
Ingredients:
FOR THE DRESSING:
Extra virgin olive oil – 1/3 cup
Lemon juice – 1 tblsp
Garlic pickle – 1 tsp
Maple syrup or honey – 1 tsp
Red chili flakes – ¼ tsp
Salt & Pepper – to taste

FOR THE BODY OF THE SALAD:
Feta cheese – 50g (cut into small cubes)
Mint leaves – a handful
Cherry tomatoes – 8 to 10 (halved)

Ripe Mango cubes – 3 tblsp
Baby cucumber – 4 (sliced lengthwise)
Pickled shallots or baby onions – 5 to 6 (halved)
Pickle olives – 4 to 6 (sliced)
Moong sprouts – 1/3 cup

Method:
1.    Take a clean small glass jar. Add in all the ingredients FOR THE DRESSING. Close the lid tightly and give it a good shake till the dressing turns slightly thicker. Keep aside.
2.    Take all the ingredients FOR THE BODY OF THE SALAD  in a large bowl (except for the feta cheese and cucumber slices). Keep them covered in the fridge till it’s time to assemble the salad.
3.    Just before serving, give the dressing a final shake. Drizzle it over the prepared salad so that it’s enough to coat them and NO MORE. Mix gently.
4.    Line a plate with the cucumber slices (like rays of the sun). Place the prepared salad in the middle.
5.    Arrange the feta cubes randomly on the salad. Drizzle some dressing on the cucumber slices. Serve immediately.
© Rinki’s Kitchen

Monday, 24 June 2019

Mango Pickle without oil recipe...


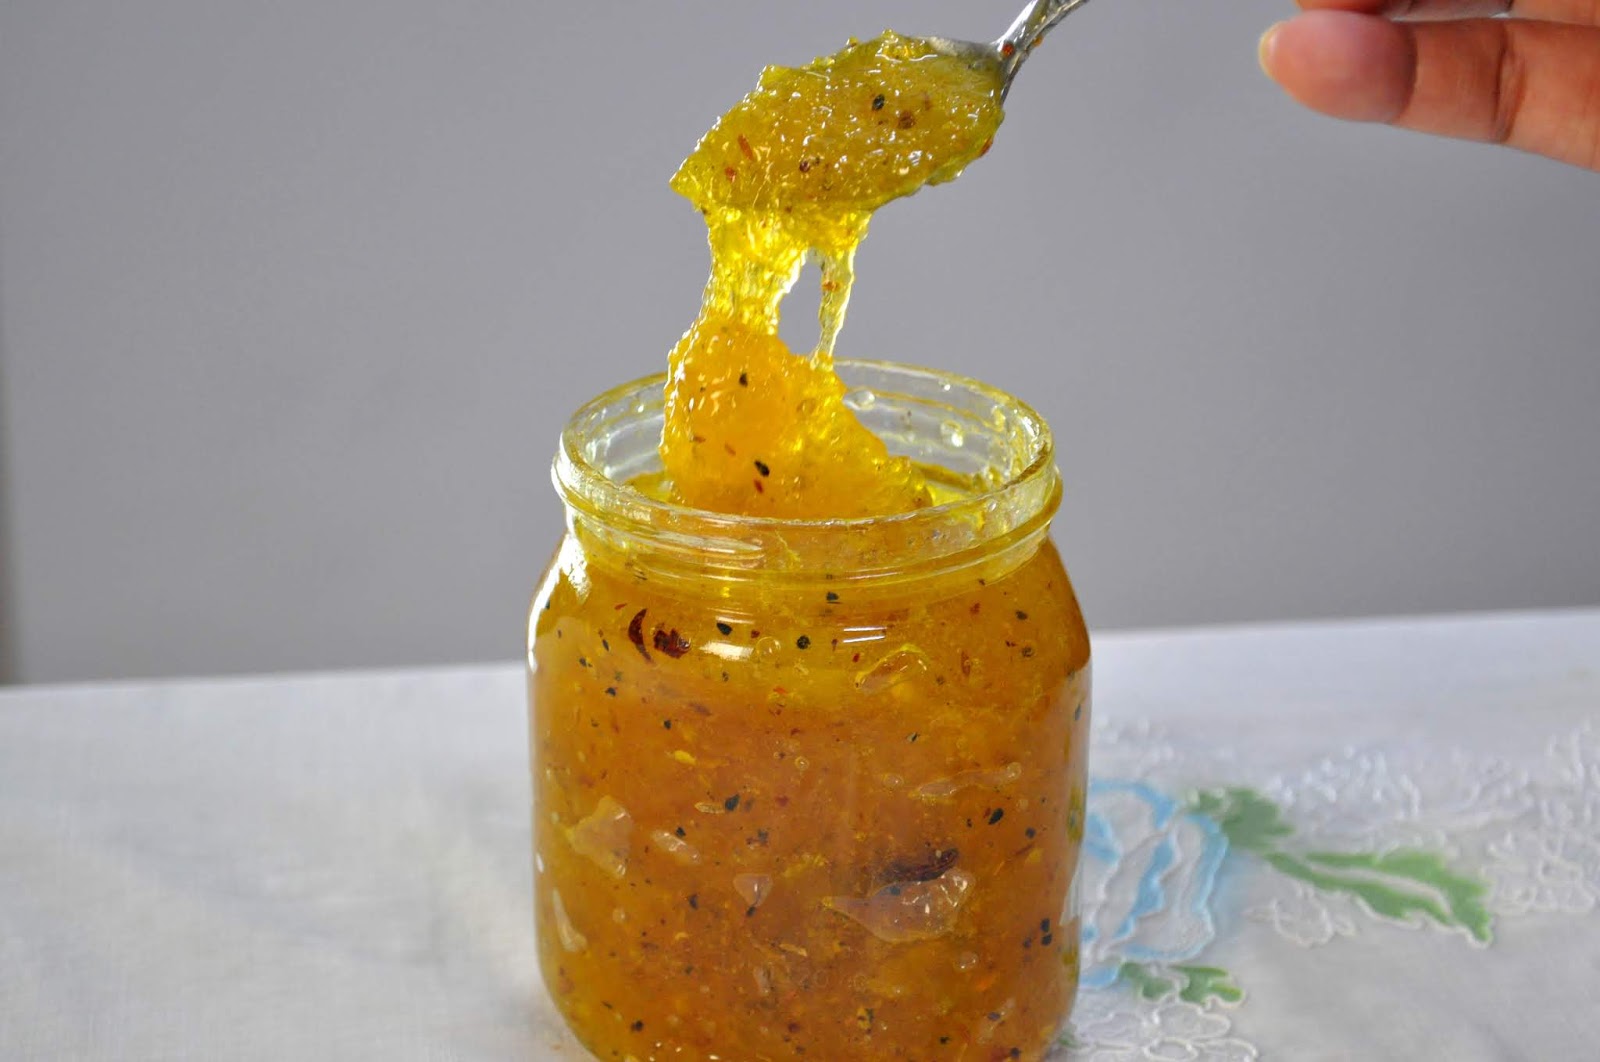
How about a Mango Pickle without oil recipe that perfectly preserves the intense flavor of mangoes? It’s an easy recipe that anyone can try out.
For more such recipes, check out my channel:  https://goo.gl/XBwLLc

With the mango season coming to a close, I thought it best to preserve some (raw mangoes) by making this mango chutney no oil recipe.
Just a handful of ingredients is all that is required.

The most important point to remember … NO MOISTURE!
Everything you use must be clean and dry including your hands.

I like to adjust the sugar according to the mangoes. Some are really tart. At the end it all comes down to your taste.
The sweet and tangy pickle or chutney can be used as a spread, served with any meal or had straight from the jar. So even though it will stay good for several months, you may run out of it much earlier than that 😊

Try the recipe…it smells mouth watering!

Note: It goes very well with puri or paratha.

Click the link below for the video:


Mango Pickle (without oil recipe)            Makes about 300g
Ingredients:
Raw mango – 500g
Sugar – 1 ½ to 2 cups or as per requirement
Salt – ¾ tsp
Cinnamon – 1 stick
Panch Foran – ¾ tsp (mix of cumin, fennel, mustard, fenugreek and onion seeds)

Dry spices:

Turmeric/Haldi powder – ½ tsp
Asafoetida/Hing – a pinch
Red chili flakes – ½ tsp

Method:
1.    Soak the mangoes in water for half an hour. Scrub to clean the sap. Wash thoroughly and drain the water. Wipe them dry with a clean cloth.
2.    Peel the mangoes and remove the flesh. Discard the seed. Chop them up into small pieces.
3.    Dry roast the panch foran (Bengali five spices) till it releases the aroma. Cool completely. Once cooled, crush coarsely.
4.    Heat a pan on low medium heat. Add in the chopped mangoes followed by ½ cup of sugar, ¾ tsp of salt and the stick of cinnamon. Mix well. Leave it till the sugar has melted completely.
5.    Add in the dry spices. Mix well. Let it simmer on low heat till the mango pieces look translucent or slightly cooked. Taste the dish and add more sugar if needed ¼ cup at a time. Let the sugar melt. Taste again and add more if required to get the desired taste.
6.    Keep cooking on low heat and mix it from time to time till it takes on a jam or thick chutney like consistency.
7.    Turn off the heat and sprinkle the crushed panch foran over it. Mix well and let it cool completely.
8.    Fill the cooled chutney into a sterilized jar. Store in a dry place. Enjoy the pickle for several months to come!

© Rinki’s Kitchen

Thursday, 20 June 2019

Thick Ice Cream Milkshake Coolers


Thick milkshake ice cream coolers can be a real treat on any day ….if you don’t mind the calories. This is a quick and easy thick shake recipe with ice cream that can be served up with three flavor combinations!
For more such recipes, check out my channel:  https://goo.gl/XBwLLc

I have used the seasonal mango (my favourite fruit) as the main flavor. You could try out different flavours too.

It’s always good to have variety!

Click the link below for the video recipe:


Thick Ice cream Milkshake Coolers with mango                Makes 3 large glasses
Ingredients
For the shake:
Chilled Mangoes – ½ cup chopped roughly
Sugar – 3 to 4 tsp
Chilled Milk – 1 ½ cups
Mango Ice cream – 4 to 5 scoops
Vanilla Ice cream – 1 to 2 scoops
 
For flavouring:
Strawberry preserve – 2 tblsp
Bloomed Chia seeds – 2 to 3 tsp
Coconut cream – 4 tsp
Whipped cream – 1 tblsp
Finely cubed mangoes – 2 tsp

For the finishing:
Whipped cream – ½ cup
Finely cubed mangoes – for garnish


Method:
1.    For the shake: Make a smooth paste of mangoes, sugar and a little milk in a mixie jar. Add in the rest of the ingredients and mix to form a smooth shake. Keep it in the fridge.
2.   Keep the glasses in the fridge for at least half an hour.
3.    Take out the glasses, to the first glass add in a tablespoon of melted strawberry preserve (melt it in the microwave with a few drops of water). Smear it on the bottom and lower part of the glass. Take some more preserve and smear a band near the top of the glass. Put it back in the fridge.
4.    To the second one, add in the bloomed chia seeds and a few pieces of the cubed mango at the bottom. Put it back in the fridge.
5.    For the third one, mix the 2 tsp coconut cream with the whipped cream. Add it to the glass and smear it at the bottom. Put it back in the fridge.
6.    Right before serving, take out the glasses and the shake. Pour the shake into each glass.
7.    Top it with some whipped cream. Add some strawberry preserve to the first glass,  some chia seeds to the second glass and some coconut cream to the third glass.
8.    Finally garnish with the mango cubes and serve immediately.
© Rinki’s Kitchen

Thursday, 2 May 2019

Jackfruit Curry in pressure cooker!


A spicy Jackfruit Curry (in pressure cooker) can very well be called a vegetarian meat curry! It (Kathal) is one of my most favourite vegetables and I especially like the tender ones.
For more such recipes, check out my channel:  https://goo.gl/XBwLLc

So, when tender Jackfruit is in season, this is one of the curries that I love to cook. It is best to cook the jackfruit curry in the pressure cooker. This allows the vegetable to cook perfectly tender.

Rice or any bread goes well with this curry. Watch how to cut whole jackfruit and cook it into a delicious curry.

Click the link below for the video:


Jackfruit Curry (in pressure cooker)        Serves 4
Ingredients:
Raw/ Tender Jackfruit(cut into 1 inch cubes) – 350 g
Tomato puree – 1/3 cup
Mustard oil – 3 tblsp + for frying
Cumin seeds – ¼ tsp for tempering
Onion – 1 large into paste
Sugar – 1 tsp
Salt – to taste
Coriander leaves – to sprinkle on top

SPICE POWDER
Chaat masala – ¾ tsp
Turmeric powder – ½ tsp
Kashmiri red chilli powder – ½ tsp

SPICE PASTE
Ginger – 1 inch
Garlic – 5 to 6 cloves
Green chillies – as per taste
Roasted Cashew nuts – 7 to 8

For Dry Roasting
Coriander seeds – 2 tblsp
Cumin seeds – ¾ to 1 tblsp
Black cardamom – 2
Green cardamom – 4 to 5
Cloves – 2 to 3
Black pepper corns – 8 to 10
Cinnamon sticks – 1 inch

Method:
1.    Cut the jackfruit into 1 inch cubes. Wash and keep aside.
2.    For Dry Roasting, take a pan and add in the spices. Roast them on low to medium heat stirring continuously till they release their aroma. Take off the heat and cool completely.
3.    In a mixie jar take the ingredients for the SPICE PASTE and the dry roasted spices. Add enough water and grind to a smooth thick paste.
4.    Shallow fry the jackfruit pieces and keep aside.
5.    In a pressure cooker, add in 3 to 4 tblsp of mustard oil and temper it with cumin seeds. Add in the onion paste and cook till it turns light brown.
6.    Add in the SPICE POWDER(s) and cook briefly before adding in the tomato paste. Cook till oil starts separating. Add in the sugar and a cup of water. Bring to a simmer.
7.    Add in the fried jackfruit. Season with salt and mix lightly. Bring to a simmer again. Add in more water to just cover the jackfruit pieces. Close the lid and let it pressure cook on medium heat for 2 whistles or until the jackfruit is cooked and tender.
8.    Sprinkle with fresh coriander leaves and serve hot with rice or chapati.
© Rinki’s Kitchen

Monday, 29 April 2019

How to make Chicken Finger Fries for snack time...


How about Chicken Finger Fries for snack time? It is one such recipe that is loved by all.
For more such recipes, check out my channel:  https://goo.gl/XBwLLc

Crispy outer coating, moist juicy chicken inside and that burst of cheese! Can’t get more indulgent than this?

These Crispy Chicken Cheese Burst Fries can be prepared ahead and stored in the fridge or the freezer until its time to fry them. So, you could actually make a large batch and enjoy it for a whole week!

Click the link below for the video:


Chicken Finger Fries    Serves 4 to 5
Ingredients:
Boneless chicken breast – 3
Cornflakes – 2 to 3 cups
Grated mozzarella – 1 cup or as needed
Eggs – 2
Vegetable oil – for deep frying

FOR THE MARINATION
Yogurt/ Curd – 2 tblsp
Garlic powder – ½ tsp
White pepper powder – ½ tsp
Red chili sauce– 1 tsp
Salt – ½ tsp

FOR THE FLOUR COATING
Plain flour – ¾ cup
Mixed herbs (dried) – 1 ½ tsp
Garlic powder – 1 tsp
White pepper powder – ½ tsp
Red chili flakes – to taste
Salt – to taste

Method:
1.    Wash, clean and cut the chicken breast pieces into strips along the breadth. Use a smaller knife with a pointed end to cut out pockets in all the strips.
2.    Mix all the ingredients FOR THE MARINATION thoroughly. Pour it over the chicken strips and mix well to coat them. Keep in the fridge for an hour (best done overnight).
3.    FOR THE FLOUR COATING mix all the ingredients using a whisk and keep aside.
4.    Crush the cornflakes slightly and keep aside. Beat two eggs and keep aside.
5.    Once the chicken has been marinated, stuff the pockets with the grated mozzarella cheese and press to close. Repeat for all the pieces.
6.    Coat the chicken strips with the FLOUR  COATING mixture. Dip each piece into the beaten egg and then coat with the crushed cornflakes. Press with your fingers to shape them.
7.    Put them in the fridge for 15 to 20 minutes before frying.
8.    Deep fry in medium hot oil till golden and crunchy on the outside and cooked from inside.
9.    Serve hot with mayonnaise.
© Rinki’s Kitchen


Monday, 22 April 2019

Iced Tea to beat the heat!


Some Iced Tea to beat the heat? Get ready to churn up refreshing concoctions with tea in your kitchen.
For more such recipes, check out my channel:  https://goo.gl/XBwLLc

How to make summer coolers with tea? All you really need are some spices, herbs, squashes and syrups and lots and lots of ice. Mix and match the different ingredients and create your own flavoured Iced Tea!

Click the link below for the video:


Iced Tea Concoctions                    3 types
Ingredients:
Assam tea liquor – 1 cup per glass of drink

FIRST ONE (per glass)
Ginger syrup – 1 ½  to 2 tblsp
Honey – 1 to 1 ½ tblsp
Mint leaves – as required
Black salt – a pinch
Tea – 1 cup

SECOND ONE (per glass)
Orange squash – 2 tblsp
Maple syrup – as required (sweetener)
Freshly squeezed ginger juice – ½ tsp
Powdered cinnamon – ¼ tsp
Tea – 1 cup
Black salt (optional)  – a pinch

THIRD ONE (per glass)
Honey – 1 ½ to 2 tblsp
Lemon or Lime – ½ to ¾
Mint leaves – as required
Tea – 1 cup
Black salt (optional)  – a pinch

Method:
1.    Make the Assam tea liquor and strain the tea immediately. Keep aside to cool completely.
2.    FIRST ONE: Mix together all the ingredients and crushed mint leaves. Stir to combine. Let it infuse for 15 mins. Pour in a tall glass that has mint leaves, a wedge of lime and lots of ice in it.  Serve chilled.
3.    SECOND ONE: Mix all the ingredients together. Stir to combine. Let it infuse for 15 mins. Take a tall glass, add in a cinnamon stick , some thinly sliced ginger and lots of ice. Pour in the prepared drink. Serve chilled.
4.    THIRD ONE: Mix together the honey and lime or lemon juice. Add in the crushed mint leaves and tea. Stir to mix and let it infuse for 15 mins. In a tall glass add in a few slices of ginger and lots of mint leaves and ice. Pour in the tea and serve immediately.

© Rinki’s Kitchen

Thursday, 18 April 2019

Homemade Cream Cheese Cheesecake Recipe


What is it about Cheesecakes that make them so popular? If it is the cream cheese then, I have the perfect recipe for you. Homemade Cream Cheese Cheesecake from scratch.
For more such recipes, check out my channel:  https://goo.gl/XBwLLc

Cheesecakes are gourmet desserts that can very easily be made at home. My cream cheese recipe is fool proof and is a reasonable alternative to the branded ones. This recipe came about due to non availability of cream cheese in the place where I lived many years ago. 

A simple vanilla flavoured cheesecake with homemade cream cheese and yogurt can be served up with a berry sauce as well as with fresh fruits and berries. The combinations can be endless.

The velvety texture of the filling with the crisp biscuit base turns out to be a heavenly experience. Try the recipe…it’s no rocket science!

Click the  link below for the video recipe:

Cheesecake Recipe with homemade cream cheese                 Serves 10
Ingredients
For the CREAM CHEESE
Full cream milk – 1 ½ liters
Lemon juice – 4 tblsp

For the BISCUIT BASE
Digestive biscuit crumbs – 1 ½ cup
Melted butter – ½ cup
Icing sugar – 3 tblsp

For the CREAM CHEESE FILLING
Cream cheese – 1 ¼  cup or about 300g
Hung curd or yogurt –  ½ cup
Sweetened Condensed milk – ½ cup
Icing sugar – 3 tblsp
Salt – a pinch
Full fat /Heavy cream – 1 cup
Vanilla essence – 2 tsp
Powdered gelatin – 1 tblsp

Hot water – 2 tblsp

For the RASPBERRY STRAWBERRY SAUCE:
Raspberry Strawberry Preserve or any berry preserve or jam – 3 tblsp
Water – 1/3 cup

Method:
1.    For the CREAM CHEESE: Boil the milk on low heat stirring continuously. Turn off the heat and add in lemon juice a tablespoon at a time. Mixing completely after each addition till the milk solids separate from the whey. This is the cream cheese. Drain and reserve the whey.
2.    Cool completely. Add the cream cheese into a food processor or mixie and mix it to a fine paste. Add a little whey as required to run the mixie. Keep the cream cheese in the fridge.
3.    For the BISCUIT BASE: Combine all the ingredients thoroughly till the mix resembles wet sand. Pour it into a loose bottom cake tin. Spread evenly and use a small bowl or glass with a flat base to smooth the top. Set it in the fridge for half an hour.
4.    For the CREAM CHEESE FILLING: Dissolve the gelatin in hot water and keep aside to cool.
5.    In a large bowl, add in the cream cheese, hung curd, condensed milk, salt and icing sugar. Beat with a whisk or electrical beater to combine. Add in the heavy cream and the essence. Beat again till light and fluffy. Add in the gelatin(should be at room temp) and combine with the cream cheese filling.
6.    Take out the biscuit base from the fridge. It should be set and firm to touch. Pour in the cream cheese filling into the tin. Smooth the top with a knife.
7.    Let it set in the fridge for at least 4 hours or best done overnight.
8.    For the RASPBERRY STRAWBERRY SAUCE: Put the ingredients in a sauce pan and simmer over low heat till you get a pouring sauce. Let it cool complete. (The sauce will thicken further)
9.    To demould the cheesecake, run a knife along the edge. Carefully push it out of the tin. Cut into weges.
10. Serve with a little berry sauce on top. Garnish with mint leaves.


© Rinki’s Kitchen